
 Call us on 01246 240880
 Sign-up and receive 10% off
How to Sow Seeds (A Beginner’s Guide)
In this video, Dave demonstrates how to sow seeds. If you're completely new to gardening, this will be a great place to start.
Related Videos


Prefer to read?
Here’s what Dave says in this video…
In this video, Dave demonstrates how to sow seeds. If you’re completely new to gardening, this will be a great place to start.
What Compost is Required to Sow Seeds
The main thing about the compost is it needs to be specifically for seed sowing because you can get ones for the later stages in plant life so you’ll find that the seed the seed setting compost or seed sowing compost is quite fine and loose so the roots can get down easily when the seeds germinate. Yeah if you have a compost that’s quite coarse sometimes some of the seeds struggle especially the smaller seeds then and obviously you want it to be peat free.
3 Three Key Things Seeds Require
The three key things that your seeds require, and I call it the M.O.T, is moisture, oxygen, and temperature. So it needs the right amount of moisture. It needs oxygen and your seed will need the right temperature to germinate. If it’s too cold, most seeds won’t germinate at all and they’ll just rot in the damp compost. If it’s too hot they’ll dry out and you’ll lose them through the heat. And so it’s about getting it sort of just right and just keeping an eye on them once you’ve got started.
Just remember MOT moisture oxygen and correct temperature to help you with your temperature and that sort of thing there’s always a guide on the back on the back of your seed packet that will tell you what sort of temperatures you’re looking for to help the germination of the seed. And there’s loads of information on most packets of seed but sometimes if you buy them off the internet you’ll just get a packet and it will not really tell you a great deal so you might have to do a bit of research.
How Deep to Sow Seeds
Another key thing with seeds as well is the depth that you set them at. And again follow the instructions on the packet if there aren’t any instructions on the packet. As a rule of thumb you can set seeds too deep but it’s difficult to set them too shallow. So if you have if you’ve any doubts about it always try and set your seed at least as deep as the seed is itself as the depth of the seed. So that seed there on the packet it’ll say just to bury that two inches deep. But if you set it at least as deep as the seed itself it should germinate and do OK. And if you set it to deep it won’t get any light or it’ll struggle to get to the surface before it runs out of steam and it’ll die or it’ll rot.
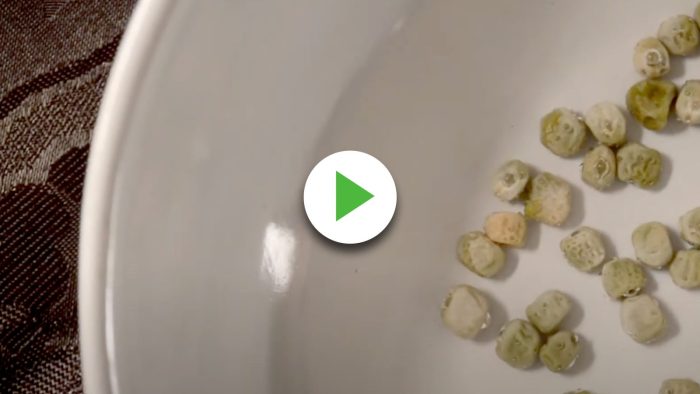
So I’ve got six different seeds here and they’re all going to be set at different depths and it can quite often depending on the size of the seed itself. So we’ve got a broad bean seed that as you can see that’s quite a large seed and that’ll be set two inches deep. We’ve got a Borlotti Bean which is a climbing bean again set that somewhere between an inch and two inches deep. The winter squash seed. That’ll be set between an inch and half an inch deep. A nasturtium which will be set half inch deep. And then you’ve got the smaller seed which is a leek seed now unusually for the size of seed that again is going to be set sort of half an inch deep If you’re going to set it in a garden you might even set that even deeper. And it’s just the variety is and as you can see the do the seeds vary in shape size color.
As you garden for a few years you’ll learn certain types of seeds the ones that you grow each year and you’ll also learn the leaves when they come through when they germinate.
What Container to Sow Seeds In
So we’ve talked about the actual seeds themselves so now we’re going to talk about how we actually set the seeds. So the first thing you need obviously is something to set your seeds in. There’s lots and lots of different containers and propagators that you can buy online or in the shops. And these are just a couple of examples so they all tend to come with a base. Make sure that your base has got drainage in. If you’re going to grow in this for example it’s got a solid base so what you need is a tray to fit inside it. that’s got drainage in it. Otherwise your plant will drown it won’t drain the water away so make sure you’ve always got good drainage in the bottom of your container and your lid obviously should fit snugly.
As I said earlier the seeds do need oxygen so what you need to have is a ventilation on the top. If you’ve not got that ventilation you can always just prop them open or take the lid off just once a day. I tend to do that anyway just to check that the seeds are germinating and coming through. So that’s one particular type you can sit it on your windowsill and over a radiator or in a nice bright the south facing window say get some sun in there.
This is just a different variety of the same thing which got three different containers in again. You’ve got your little container a little tray that sits in there. It’s got drainage holes. you’ve got your ventilation on the top and they range from ten pound up to whatever you can get them with heated pods in the bottom that are really expensive. And personally I think they’re great but you can make your own quite inexpensively.
How to Sow Seed in Propagators
So I’ll just show you some of the sort of things that you can do yourself. So that’s an old mushroom container but all I’ve done is put some holes in the bottom that’s the tray that’s had So the fresh chicken you know it might have had strawberries you know something like that and you’ll find that it’ll just fit on top and you’ve got exactly the same thing that you’ve paid pounds for and it’ll do exactly the same job.
The other thing to remember again is to take the top off every so often just to make sure you get some oxygen But yeah if you notice that it’s getting condensation and that’s not a bad thing. It just means it’s getting warm again. Take the top off you might want to dry it out stop any diseases getting in there and then just pop it back on. As I say our check them most days anyway And if you just get into the habit of doing it. So that’s one that you can easily get yourself another one. I think this had doughnuts in it or something. And again that will just fit on a larger tray it doesn’t have to fasten on it just sits on that’ll keep the heat in lets the light through. That’s the thing. The top one does need to be clear and that will do exactly the same job as your ten pound pound propagator from a shop.
What to Use as a Label when Sowing Seeds
Same with same with labels as well. If you want to label them up I tend to keep the labels each year. Just wash them off they’re bought ones These are ones I’ve just made from an old plastic bottle just chopped them up They can write on it just the same. Stick it in your compost and it does the same job completely free you reusing your plastic and that lasts forever. And again if you write on a permanent marker use the same label next year. Just keep them in a tray with your seeds.
How to Sow Seeds in Modular Trays
The other sort of trays that you might use for say seeds especially your larger seeds or seeds that you’re going to set out in plugs. are your modular trays. Now these can come in many shapes and sizes. That’s a typical one that you can buy. You get about five of those for a couple of quid and again they’re quite flimsy. They’ll last two or three seasons at least if you look after them give them a good wash before you reuse them. They just sit in your tray They’ve also got drainage holes in the bottom and they just sit in there. What you can do is well if you buy quite a few plants from garden centers or supermarkets they tend to come in these things. It’s exactly the same as you just paid a couple of quid for from the shop. And again just wash them out.
Look after them reuse them And again you’re saving on plastic and there’s loads of different shapes and sizes. Trays like that are good for things like beetroot starting beetroot off or your larger half hardy plants for your flower bed that one that’d be great for things like broad beans or even your courgettes or things like that just to give them a good start as the black ones can’t be recycled. As far as I know the green ones they’ll be recyclable if you can use those for two or three years before you recycle. It’s saves your money and it’s saves the environment
How to Sow Small Seeds
so now we come to the best bit the most exciting part of gardening for me is actually setting the seeds and seeing what what you can germinate. And what people find most difficult is the really tiny seeds that you set on the surface of compost and in particular the watering of them. The easiest way to get the water into the compost is to actually do it before you set the seeds on top of the compost. So use a seed tray and just half fill it with water and stand your your plant pot that You’re going to use these seeds or the tray in there. Soak up the water until the top of your compost is actually wet. You can see that that’s now a different color to that and it’s actually wet.
So let’s take that out now because it’s quite heavy and soaked up the water. I’ve also got one here. That’s a tray variety so I can show you both sorts Now I’m going to set these antirinum seeds first and they’re actually almost like dust. So they’re going to sit on the top because they’re so small. We don’t cover them over because if you exclude the light they won’t germinate. So I’m going to carefully just tap the packet just as I’m watching the seeds. I can see them rolling down the packet onto the surface. The compost There’s only about seeds in here so it’s just a couple more seeds so that those seeds are on there now. There’s nothing left in the packet I will label those later. So you don’t need to do anything else with that now.
Use a Plastic Bag to Germinate Seeds
All you need to do is to keep it warm So with that what I’m going to do is use the cheapest propagator known to man which is a plastic bag a clear plastic bag. So when you’ve done for grocery shopping and you empty your apples out your plastic bag or whatever it is you’ve bought them in you can just pop that on there. You can put an elastic band around it just keep it tight. But I tend not to bother. I’ll just sit the plant on it the pot on it. And that again if you put that on a warm windowsill every day you just take the bag off. You’ll find that it does get condensation on it just shake the water out and then pop it back on. And As you seeds germinate you take the bag off and you don’t want to leave the bag on when the seeds are coming through because it’ll be too hot.
Once it’s germinated the seeds. It’s done its job. You can remove it. Try not to use the bag again for the same purpose because the condensation might start to turn into the breeding ground for diseases. but that’s that’s that one. So we’re going to set some Dianthus seeds on this one again because they’re quite small and they just need a very fine covering of compost I’ve done the same process as I did for the antirinum I’ve let the compost soak up. The water can feel that it’s sodden with water. It’s it’s not dripping out but it’s wet through.
So again these are quite small seeds but they are a little bit bigger and these just want a very very fine covering of soil or compost on the top. As you can see the thing is as well try and space them out. Don’t put them all in one corner. The other thing is about watching them afterwards especially with seeds. This size is you’ll find that. It doesn’t matter how hard you try to be careful The seeds will wash to to one end of the tray and then they’ll all grow in one small area which is fine. They’ll germinate but they become leggy when when the seedlings become leggy they tend to what we call dampen off by leggy I mean they just grow tall and spindly and the stem once the stems damaged because of damping off they tend to go down towards the compost and they just fall over. And once that’s happened you can’t save them. So again just taking a pinch of seed and just spreading them around. So just going to cover this you can get a sieve. but even with my grubby hands. All you need to do is just basically. Shake your hand over the top. See the compost. Nice and fine anyway and all I’m doing is just spreading a little bit of that compost over the top. And that is just enough for those seeds.
Do You Need to Use Vermiculite or Perlite when Sowing Seeds?
Now you can use other products called vermiculite or perlite which are like very fine white. It’s almost looks like there’s a bit of it in this compost. It’s this little white product here and all you do is just sprinkle that on top. And that lets the light through because it’s sort of translucent if you like. If you were doing sort of succulent plants or maybe rockery plants houseleeks perhaps in a pot you can add that to it and helps with the drainage It’s really good for that and it’s quite lightweight as well. There’s no weight to it. So if you’ve got a large amount it’s easier for when you moving things about which is another plus to it. But it does crush up But yeah again it’s quite expensive. So again if you can if you’re on a budget and you don’t want to lay out for it yes it’s good but you don’t always need it.
Can You Save Seeds to Sow Next Year?
So some seeds are no more notorious for being difficult to germinate things like parsnips that you’d normally set five seeds for every parsnip that you want to grow because they can be difficult to germinate. And then you also you’ll have seeds that aren’t viable What we call they’re not viable which means that whatever you do for them they’re not going to grow anyway. It’s just nature that’s you know they’re just not going to not going to produce anything for you. And it’s looking after your seeds. You can It’s better to buy fresh seed every season. There’s no doubt about it because they do. You do tend to have a better success rate as in germination wise or if you’ve got a packet of seeds which you might have sort of things like mesembryanthemum which is a half hardy annual you wouldn’t set seeds in one season so you can save. Yeah. So I’ve I’ve used mesembryanthemum and seeds up to five years after I first bought them and they still grow. You don’t get this that the massive success but you’ll get enough because you’ll set the hundred seeds and you might only want plants . Yeah. So if you get 50% success rate you’ve got enough plants and the same with saving seeds from certain plants. You can do it with some. It’s more difficult to do with others So things like climbing beans you can as long as you let them dry off on the plant itself they’ll tend to be pretty successful and things like flowers like foxgloves Yeah million seeds from one plant will do the job for it or just send them round the whole of your garden.
How to Store Seed Packets
A lot of seed packets come with the little foil pouch inside. Always put your seeds that you’ve not used back into that foil. Make sure there’s no air in it if you can help it you know squeeze the air out fasten it up tight put it back in its packet So you know what What plant it is what variety and then store in a dark dry relatively cool place. And I’ll keep mine in a little tray it in a drawer in the front room which is away from any radiators or anything like it’s completely dark so dry dark and no moisture and an obviously not too much heat.
How to Sow Tomato Seeds (Tie Dye Green)
So we’ll do that. Then we’ll set a few tomatoes. I’ve got a variety here called tie dye green so we’re going to grow some of those. So again on the back of the packet it should tell me how deep to set them eighth of an inch. So we’ll go with that. So I’m just going to I’m just going to grow in the pot we only want this year. We’re just going to grow one of each variety. So I’m only going to set about three seeds now. It depends which whichever size pot you want to to set them in. I’m just going to set them in this one. So again “as long as they’ve got enough depth?” yeah that’s the thing with the tomato I want it to have a good root system. So that’s why I’m not. I’m going with this one. Rather than that I could get three in there but there’s not much root depth and with the tomatoes you want to build a good root system. So I’m not going to water this at the minute.
I’m going to set the seeds on the top of the compost so always firm your compost down. You don’t want to firm it too much because you need the oxygen in the soil but you don’t want lots of pockets in it as well. And so there’s quite quite a lot of seeds in here so I’m just going to tip them out. There’s three there. So we’ll just set those three. So because they’re quite a decent size I’m just going to set them around the edges of the pot. sort of just in a triangular shape obviously. because there’s three of them and it says to to cover them with an eighth of an inch so that’s not very much still but again same process But what you need to make sure you do with any seed really is make sure that it’s got some contact with the compost so it can draw the moisture from the compost. tap it down just a little gentle pressure with the back of your hand and that’s that done and again get a label in it give it a water if you’re going to water it from above
How to Water Newly Sown Seeds
Always use a watering can with a rose. That’s what we call the rose. And because if you try to do it with a can without that you’ll end up just washing all the compost and the seeds out. So do it from quite a distance as well so you don’t want to be there. You want to be sort of up there and just give it a quick water. You’ll know when it’s got enough because The pot will be heavier You’ll be able to tell the difference it doesn’t have to be. So it’s sort if absolutely drowned It just needs to be moist. If it sat in water there’s no oxygen in the soil. And as we’ve said part of the M.O.T you need oxygen so you need to make sure that there’s some oxygen still in there and it’s not just completely sat in water. As I said it can just drown them and they’ll rot They’ll never germinate So again same with that one. I’ll pop that into a bag. Once I’ve watered it the same process onto a warm windowsill. Check it every day just to make sure that as soon as they come through you take the top off.